There are few places on Earth that ignite the imagination quite like The Pinnacles in Nambung National Park, Western Australia. This ancient desert landscape, dotted with thousands of limestone spires rising eerily from the golden sand, offers an almost extraterrestrial experience. For any photographer, it presents a truly unique and compelling canvas.
As a seasoned traveler and storyteller, I’ve had the privilege of witnessing countless natural wonders, but The Pinnacles hold a special place in my memory. Their silent grandeur whispers tales of geological time, inviting contemplation and inspiring awe. This guide is designed to help you not just see The Pinnacles, but truly capture their essence through your lens. We will explore the essential Perth Famous Landscape tips for mastering this extraordinary location, ensuring your photographs tell the rich story of this iconic Perth Famous Landscape.
Understanding the Light in the Nambung National Park
Light is the soul of photography, and nowhere is this more evident than in a vast, open desert landscape like Nambung National Park. The quality and direction of light profoundly impact the mood, texture, and colour in your images. Understanding its nuances here is paramount to capturing the true spirit of The Pinnacles.
During the harsh midday sun, the light at The Pinnacles can be unforgiving, casting deep, unflattering shadows and creating stark contrasts. This can lead to blown-out highlights and underexposed shadows, making it challenging to capture detail. While some photographers might leverage this for high-contrast, abstract black and white shots, it's generally not ideal for showcasing the landscape's full spectrum.
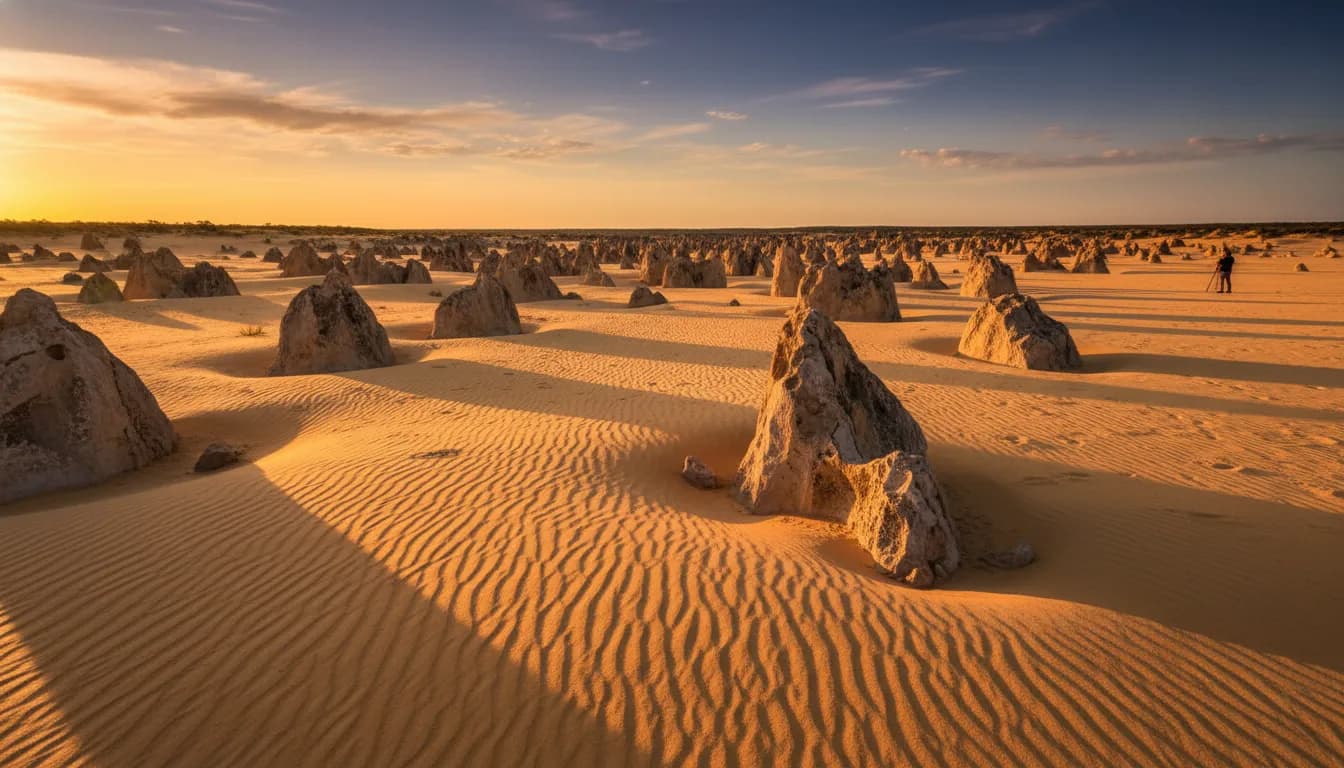
The magic truly begins during the 'golden hour,' occurring shortly after sunrise and before sunset. This period bathes the pinnacles in a warm, soft, and directional light, creating long, dramatic shadows that accentuate their unique shapes and textures. The colours of the sand and sky become incredibly rich and vibrant, transforming the scene into a painter's dream.
I recall a particular evening shoot where the setting sun painted the western faces of the pinnacles in fiery oranges and deep reds. The eastern sides, however, were bathed in cooler, softer tones, creating a beautiful contrast that made the landscape come alive. This interplay of warm and cool light is a hallmark of golden hour photography in the desert.
Conversely, the 'blue hour,' just before sunrise and immediately after sunset, offers a different kind of enchantment. The sky transitions into deep blues and purples, providing an ethereal backdrop for the silhouettes of the limestone formations. This cool, diffused light can evoke a sense of mystery and solitude, making for incredibly atmospheric images.
Even on overcast days, there's an opportunity for unique shots. The diffused light reduces harsh shadows and provides a softer, more even illumination, which can be excellent for bringing out intricate details and subtle colour variations in the rock formations. Each type of light offers a distinct photographic opportunity, urging you to adapt your vision to the prevailing conditions.

Equipment Needed for Desert Landscapes
Venturing into Nambung National Park with a camera requires more than just a keen eye; having the right equipment is crucial for both capturing stunning images and protecting your gear. The desert environment, with its fine sand and sometimes extreme temperatures, demands a thoughtful approach to what you pack. As someone who has navigated various challenging landscapes, I can attest that preparation is key to a successful shoot.
Firstly, a reliable camera body is non-negotiable. Whether you prefer a DSLR or a mirrorless system, ensure your camera has good dynamic range to handle the contrasts of desert light. Weather-sealed bodies are highly recommended to protect against dust and sand ingress, which can be a real threat in this environment.
When it comes to lenses, versatility is your best friend. A wide-angle lens (e.g., 16-35mm or 14-24mm) is essential for capturing the vastness of the landscape and fitting multiple pinnacles into your frame. It allows you to create dramatic compositions that emphasize the scale of the formations against the expansive sky.
A mid-range zoom lens (e.g., 24-70mm) provides excellent flexibility for general landscape shots and isolating groups of pinnacles. I often find myself switching to this lens to capture specific clusters or to frame a particularly interesting formation with a bit more context. It's a workhorse for many of my travel assignments.
For isolating individual pinnacles, compressing perspective, or capturing distant details, a telephoto lens (e.g., 70-200mm) can be incredibly effective. It allows you to focus on the unique textures and shapes of individual formations, bringing them closer and creating a more intimate portrait of the landscape.
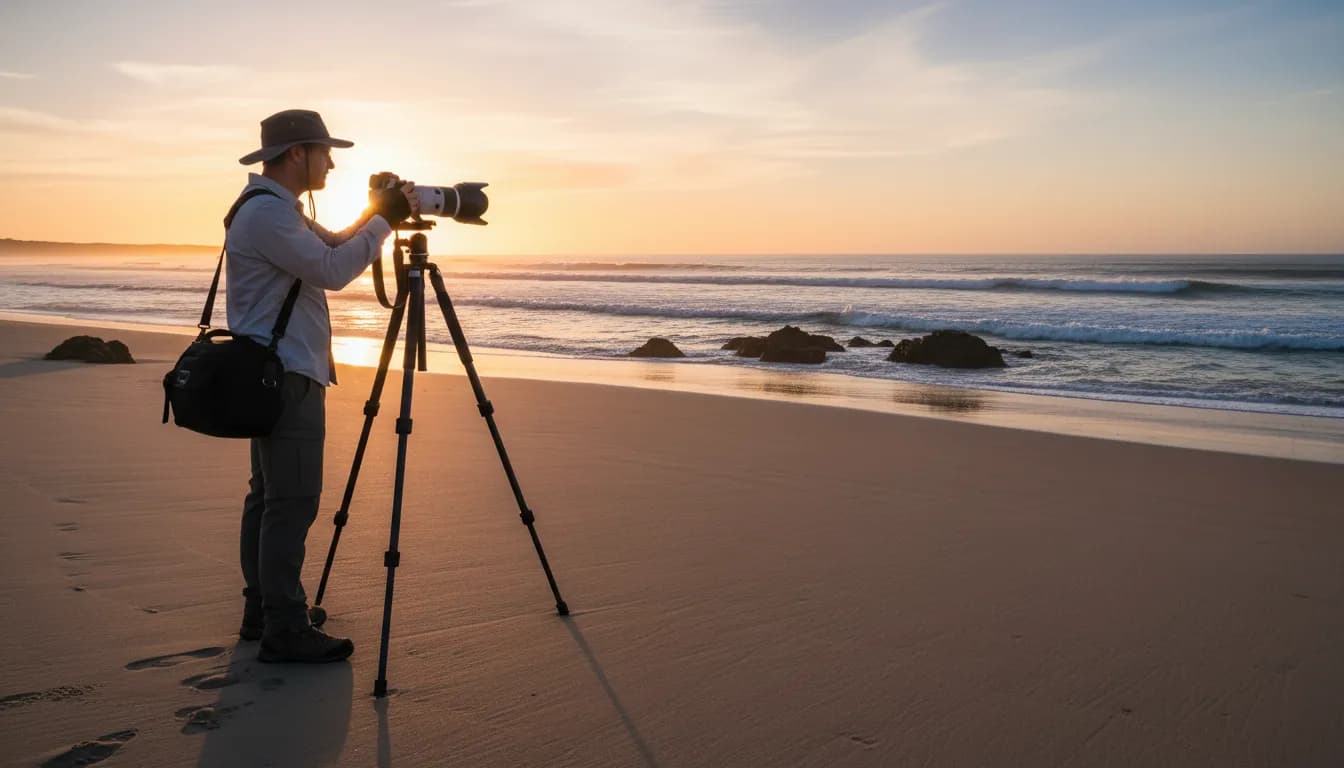
A sturdy tripod is absolutely vital, especially for low-light conditions during sunrise, sunset, or night photography. It ensures sharp images, allows for longer exposures, and frees you up to meticulously compose your shots. Don't skimp on this; a flimsy tripod will be a source of endless frustration in the desert wind.
Filters are another invaluable tool. A polarizing filter helps to reduce glare from the sky and sand, deepen blue skies, and enhance contrast, making colours more vibrant. Neutral Density (ND) filters allow for longer exposures during daylight hours, useful for blurring movement (if applicable, though less so for static pinnacles) or creating ethereal effects.
Don't forget essential accessories. A good cleaning kit (blower, microfiber cloths) is paramount for removing dust from your lens and sensor. Extra batteries are a must, as extreme temperatures can drain them quickly, and you wouldn't want to miss a shot. A remote shutter release helps avoid camera shake, especially for long exposures. Finally, a robust, dust-proof camera bag will protect all your valuable gear as you traverse the sandy terrain. I once had a camera bag fail in a similarly dusty environment, and the resulting damage taught me a harsh but unforgettable lesson about investing in quality protection.
Composition Techniques for Limestone Formations
Composing striking images at The Pinnacles goes beyond merely pointing your camera at these natural sculptures. It involves a thoughtful arrangement of elements within your frame to create visual harmony, depth, and a compelling narrative. The sheer number and variety of formations offer endless creative possibilities, but a few key techniques can elevate your photographs from good to exceptional.
One of the most fundamental principles is the Rule of Thirds. Imagine your frame divided into nine equal sections by two horizontal and two vertical lines. Placing your main subject, such as a particularly prominent pinnacle, along these lines or at their intersections often creates a more balanced and dynamic composition than simply centering it. This draws the viewer's eye naturally through the scene.
Leading lines are incredibly powerful in this landscape. The tracks left by visitors, the natural curves of the sand dunes, or even rows of pinnacles themselves can guide the viewer's eye towards a focal point, adding depth and direction to your image. I often look for pathways or natural depressions in the sand that lead directly to a majestic formation, creating a sense of journey.
Framing is another technique that adds context and depth. Use nearby pinnacles, small shrubs, or even the vast expanse of the sky to naturally frame your main subject. This can isolate a specific formation while still hinting at the larger environment, drawing the viewer's attention to your intended focus.
Incorporating foreground interest is crucial for adding depth and scale to your wide-angle shots. Look for interesting sand ripples, small desert plants, or a lone, smaller pinnacle to place in the foreground. This creates a layered effect, pulling the viewer into the scene and providing a sense of dimension.
To truly convey the immense scale of The Pinnacles, consider including a recognizable element, such as a distant person (respectfully, without making them the sole subject) or a vehicle on the designated track. This provides a human reference point, allowing viewers to grasp the colossal size of these ancient structures. I remember standing next to a particularly tall pinnacle, feeling dwarfed, and knew I needed to include myself (or a fellow traveler) in a shot to properly illustrate its grandeur.
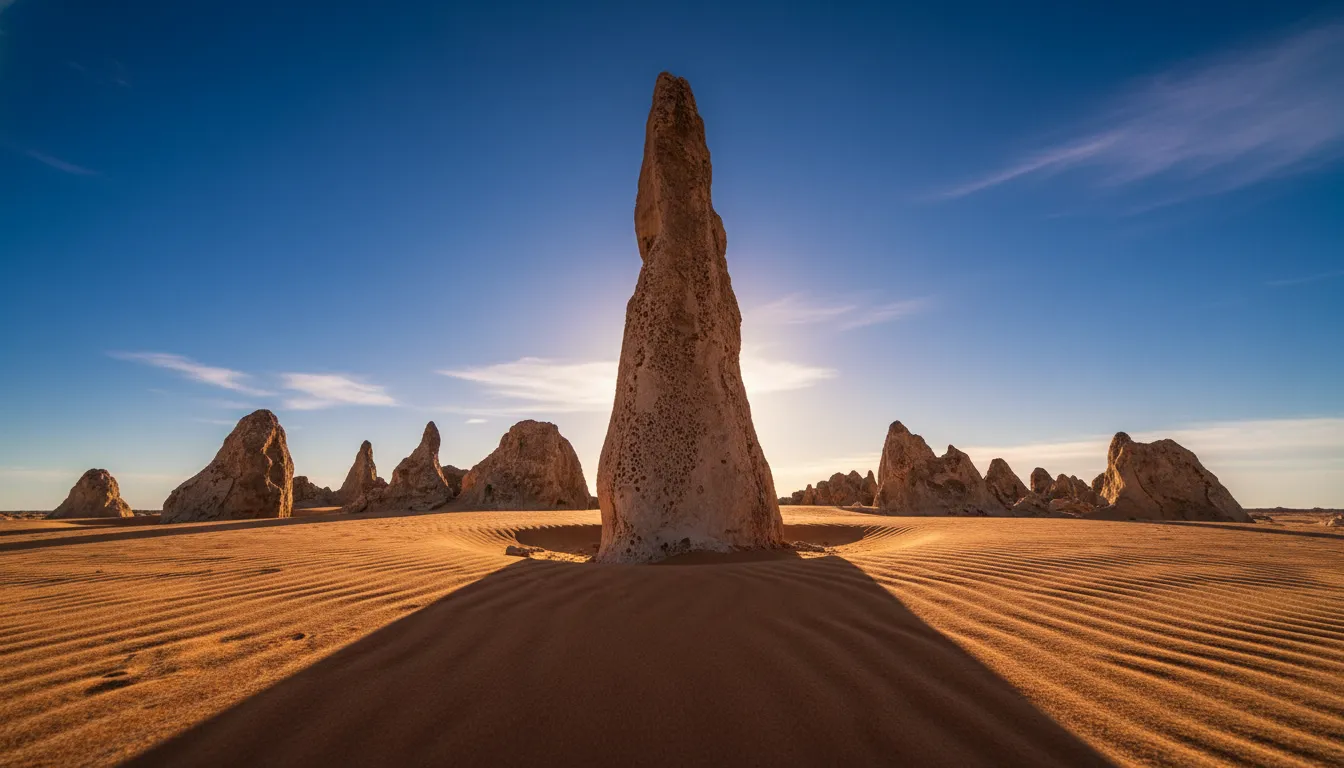
The patterns and repetition found within the field of pinnacles can also be a strong compositional element. Look for clusters of formations that create interesting geometric shapes or rhythmic sequences. Varying your perspective, perhaps by getting low to the ground, can emphasize these patterns and transform an ordinary scene into an abstract masterpiece.
Don't shy away from using negative space. The vast, open sky above The Pinnacles can be a powerful compositional tool. By allowing ample empty space around your subject, you can emphasize its isolation, its grandeur, and the sheer emptiness of the surrounding desert, evoking a sense of calm and wonder. Experiment with different angles and perspectives; sometimes, simply kneeling down or finding a slight elevation can dramatically alter your composition and reveal new photographic opportunities.
The Best Time of Day for The Pinnacles
Timing is everything when photographing The Pinnacles, and choosing the right time of day can dramatically alter the character and impact of your images. While the park is accessible throughout the day, certain hours offer unparalleled photographic opportunities that are worth planning your visit around.
Without a doubt, sunrise at The Pinnacles is an experience that transcends mere photography; it's a profound connection with an ancient landscape. Arriving before dawn allows you to witness the subtle transition of colours across the eastern sky, from deep indigo to soft pastels, before the first golden rays kiss the tips of the formations. The light is incredibly soft and warm, casting long, dramatic shadows that sculpt the pinnacles and bring out their intricate textures. Moreover, sunrise generally means fewer crowds, offering a serene and uninterrupted photographic experience. The air is often cool and crisp, adding to the tranquil atmosphere.
Equally captivating is sunset. As the sun dips towards the western horizon, the pinnacles are bathed in a rich, golden glow that deepens into fiery oranges and reds. The long shadows stretch eastward, creating dynamic patterns across the sand. Sunset is perfect for capturing dramatic silhouettes of the formations against a vibrant sky, evoking a sense of mystery and grandeur. The changing colours of the sky, from brilliant yellows to deep purples, provide a spectacular backdrop for your compositions.
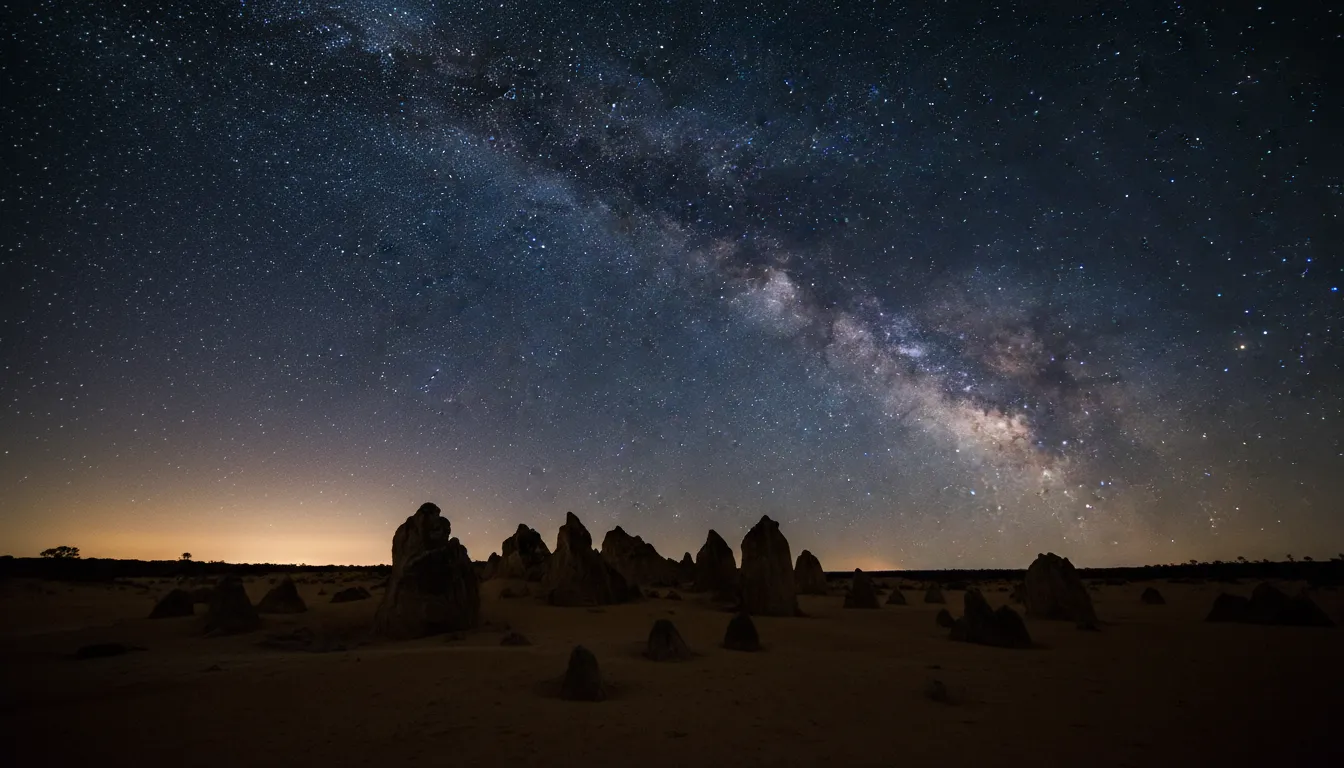
For those adventurous enough to stay after dark, night photography at The Pinnacles is an absolute must. Nambung National Park boasts incredibly dark skies, far removed from city light pollution, making it an ideal location for astrophotography. Imagine the Milky Way arching majestically over the silhouetted pinnacles, or capturing star trails as the earth rotates. A sturdy tripod, a wide-angle lens with a large aperture (f/2.8 or wider), and a remote shutter release are essential for these breathtaking shots. I distinctly remember lying on the sand, gazing up at the countless stars, feeling a profound sense of connection to the cosmos—a feeling I strive to convey in my night sky images.
While midday is generally advised against due to harsh light, it's not entirely without its merits for certain artistic interpretations. The high contrast can be utilized for stark, graphic black and white images, emphasizing the sculptural forms of the pinnacles. However, be prepared for very strong shadows and bright highlights, which can be challenging to manage in post-processing. If you must shoot midday, look for opportunities under small clouds for diffused light, or focus on details and textures in direct sunlight that can handle the intensity.
Ultimately, the 'best' time depends on the story you want to tell and the mood you wish to convey. For a comprehensive portfolio of The Pinnacles, I always recommend experiencing both sunrise and sunset, and if possible, a magical night under the stars. Proper planning, including booking accommodation nearby in Cervantes or Jurien Bay, is essential to maximize your time at this incredible Perth Famous Landscape.
Post-Processing Tips for Desert Hues
The journey of creating a stunning photograph of The Pinnacles doesn't end when you click the shutter; post-processing is a crucial step that allows you to refine your vision and bring out the true beauty of the desert hues. The raw files captured by your camera hold immense potential, and with a few strategic adjustments, you can transform them into captivating works of art. My own workflow often involves meticulous adjustments to truly capture the magic I felt on location.
One of the first steps is color correction and white balance. The desert light can sometimes fool your camera's automatic white balance, resulting in images that are too cool or too warm. Adjusting the white balance to accurately reflect the natural colours of the sand and sky is essential for a realistic and pleasing image. I often find a slight warmth enhances the golden hour glow, for instance.
Next, focus on exposure adjustments. Desert scenes often have a wide dynamic range, with bright skies and deep shadows. Use the highlights and shadows sliders to recover detail in both the brightest and darkest areas of your image. This helps to create a more balanced exposure and prevents information loss in either extreme. Sometimes, a subtle lift in shadows can reveal hidden textures in the rock.
Contrast and clarity are particularly effective for bringing out the rugged textures of the limestone formations. Increasing contrast adds punch and separation between tones, making the pinnacles stand out against the sky and sand. The clarity slider, used judiciously, can enhance mid-tone contrast, making the details of the rock appear sharper and more defined without over-sharpening. However, be careful not to overdo it, as it can lead to an unnatural, HDR-like effect.
To enhance the natural vibrance of the desert, adjust vibrance and saturation. Vibrance selectively boosts less saturated colours without oversaturating already vibrant tones, which is perfect for enriching the blues of the sky and the subtle yellows and reds of the sand. Saturation, on the other hand, boosts all colours equally; use it sparingly to avoid an artificial look. My goal is always to make the colours feel as vibrant as they did to my eye, not necessarily to create hyper-real hues.
Sharpening is crucial for adding crispness to your images. Apply sharpening to bring out the fine details in the limestone and the texture of the sand, but always zoom in to 100% to ensure you're not introducing unwanted noise or halos. For night shots, noise reduction is often necessary to clean up any grain that results from high ISO settings, ensuring a smooth and clean background for your stars.
Finally, don't overlook cropping and straightening. Even a perfectly composed shot can benefit from a slight crop to refine the composition, remove distracting elements, or adhere to specific aspect ratios. Straightening horizons is a must for any landscape photograph; a crooked horizon is a common oversight that detracts from an otherwise excellent image. Local adjustments, such as dodging and burning specific areas, can further guide the viewer's eye and add depth to your photograph. For instance, a subtle dodge on a pinnacle's face can make it pop against the background. These precise adjustments allow you to sculpt the light and shadow exactly as you envisioned it.
Conclusion
The Pinnacles of Nambung National Park represent more than just a geological marvel; they are a timeless canvas for photographers and a profound testament to the Earth's enduring artistry. As a professional content writer and an ardent explorer, I’ve found that few landscapes offer such a compelling blend of natural beauty and photographic challenge. This iconic Perth Famous Landscape truly invites you to engage with its ancient spirit.
From understanding the transformative power of light to selecting the right equipment and mastering compositional techniques, we've explored the essential Perth Famous Landscape tips for capturing this extraordinary destination. Whether you're chasing the soft hues of sunrise, the dramatic colours of sunset, or the celestial wonders of the night sky, thoughtful preparation and execution will elevate your photographic journey. The careful post-processing of your images will further ensure that the stories you wish to tell are vividly brought to life.
My hope is that this guide empowers you to not only take technically proficient photographs but also to truly connect with the cultural and historical significance of this landscape. The Pinnacles, with their silent, enduring presence, offer a unique opportunity for personal discovery and a chance to create unforgettable visual stories. This aligns perfectly with MLIFEON’s mission: inspiring connections and fostering a deeper appreciation for global wonders, whether they are cultural festivals or breathtaking natural formations.
So pack your gear, plan your visit, and embark on your own photographic adventure to The Pinnacles. May your journey be filled with discovery, your lens capture exquisite moments, and your images inspire others to experience the silent grandeur of this incredible Perth Famous Landscape. May your photographs serve as a bridge, connecting viewers to the raw, untamed beauty of Western Australia and encouraging a shared appreciation for our planet's diverse wonders.