Why Sydney Beaches Are Photography Paradise
I've been photographing Sydney beaches for eight years, and I'm still finding new angles, light conditions, and moments that take my breath away. Sydney's combination of dramatic coastline, quality light, and constantly changing conditions makes it one of the world's best locations for beach photography.
You don't need expensive gear to capture stunning beach photos here. I started with a basic DSLR and kit lens. Now I shoot with better equipment, but some of my favorite photos were taken with that beginner setup. What matters is understanding light, timing, composition, and knowing where to position yourself.
For Vietnamese photographers visiting Sydney: the light here is different from Vietnam (harsher midday sun, more dramatic golden hours), and the ocean conditions create unique opportunities. This guide covers everything I've learned about photographing Sydney's spectacular coastline.
Best Times for Beach Photography
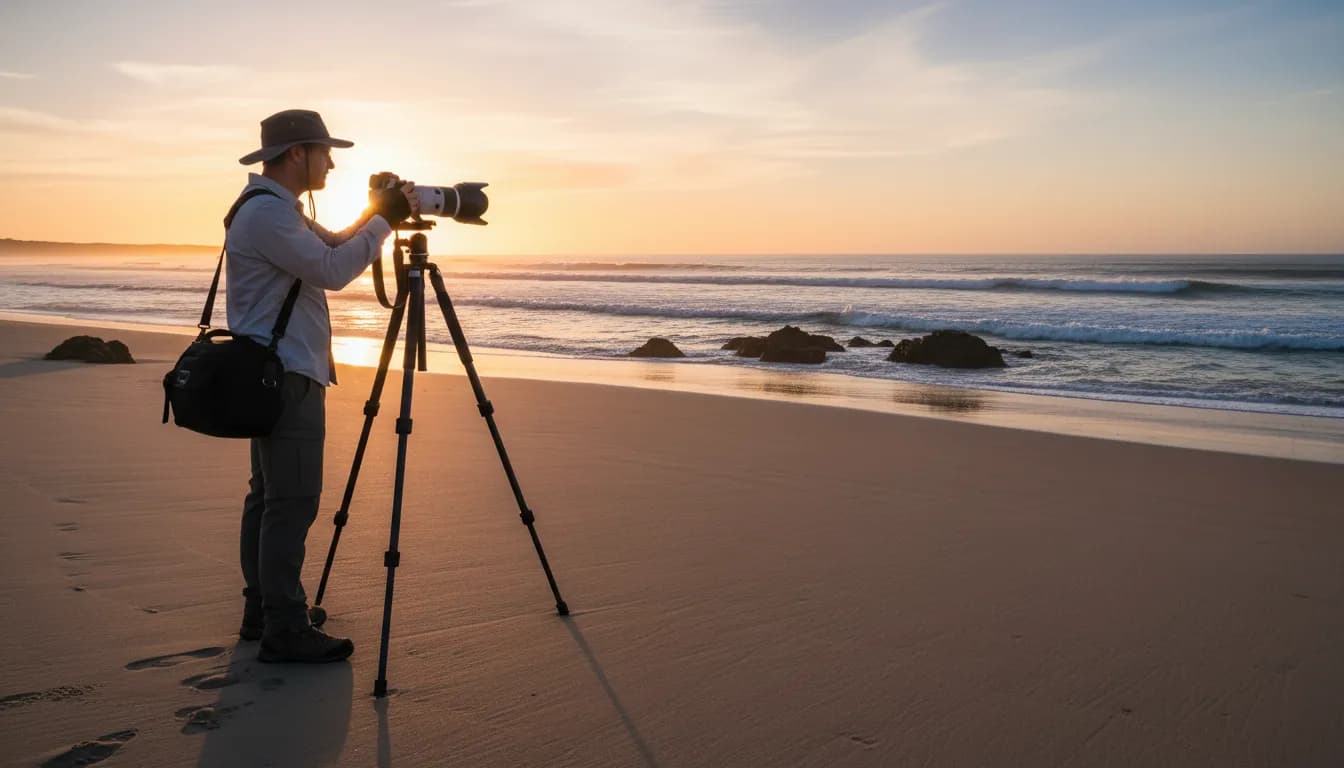
Golden Hour (Sunrise & Sunset)
Golden hour is magic time for beach photography. In Sydney, sunrise happens 5:30-7:30am depending on season, sunset 5-8pm. The light is soft, warm, and creates that beautiful glow everyone loves.
Sunrise advantages:
• Fewer people (empty beaches)
• Calmer conditions
• East-facing beaches get direct light
• Morning swimmers, surfers as subjects
• Often clearer skies
Sunset advantages:
• West-facing harbour beaches get direct light
• More dramatic skies (afternoon clouds)
• Warmer tones
• People enjoying evening beach time
• Don't have to wake up at 5am
I prefer sunrise for ocean beaches (Bondi, Bronte, Coogee face east), sunset for harbour beaches (Balmoral, Camp Cove, Milk Beach face west).
Blue Hour
Blue hour happens 20-40 minutes after sunset (or before sunrise). The sky turns deep blue, city lights come on, and you get that magical transition time. Harbour beaches with city views (Milk Beach, Balmoral) are spectacular during blue hour.
You'll need a tripod for blue hour – light levels drop and you need longer exposures. But the results are worth it.
Midday (Yes, Really)
Everyone says avoid midday light. For portraits, that's true. But for seascape photography, midday can be brilliant. The harsh overhead sun creates vibrant turquoise water colors that don't appear at other times.
Best midday subjects:
• Aerial-style shots of clear water
• Rock pools (see through crystal clear water)
• Abstract water patterns
• High-contrast black and white
Best Sydney Beach Photography Locations
Bondi Beach South End (Icebergs)
The classic shot: Bondi Icebergs pool from the Bondi to Bronte coastal walk. This is Instagram-famous for good reason – it's genuinely spectacular, especially when waves crash over the pool walls.
Best time: Sunrise (6-7am) when light hits the pool and beach
Access: Walk the coastal path from Bondi (south end)
Tip: Get there early – this spot gets crowded with photographers
Wedding Cake Rock, Royal National Park
Actually closed due to dangerous cliff erosion, but the surrounding Royal National Park coastline offers dozens of spectacular viewpoints. Dramatic cliffs, turquoise water, and wild coastline.
Access: Bundeena, various coastal walks
Best time: Morning or late afternoon
Warning: Stay back from cliff edges
North Curl Curl Headland
Looking down on North Curl Curl Beach and the rock pool from the headland creates beautiful compositions. You get the curve of the beach, the pool, surfers, and sweeping ocean views.
Best time: Morning light
Subjects: Surfers, beach curve, rock pool patterns
Mahon Pool, Maroubra
This natural rock pool creates stunning compositions when waves wash over. The rocks, pool, and crashing waves combine for dramatic shots. Challenging conditions (slippery rocks, waves), but worth it.
Best time: Mid to high tide with moderate swell
Safety: Watch for waves, wear grippy shoes
Milk Beach, Vaucluse
Small harbour beach with direct views to Sydney Harbour Bridge and city skyline. Sunset here is spectacular – the light hits the city and bridge perfectly.
Best time: Sunset, blue hour
Subjects: Bridge, city skyline, calm water reflections
Essential Beach Photography Techniques
Long Exposure for Silky Water
Long exposures (1-30 seconds) turn choppy water into smooth silk. You need:
• Tripod (essential)
• ND filter (neutral density) to reduce light
• Remote shutter or timer (prevent camera shake)
I use 6-stop ND filter for daytime long exposures. For sunrise/sunset, you might not need filters – natural low light allows longer exposures.
Technique:
1. Set up tripod on stable ground
2. Compose your shot
3. Attach ND filter
4. Switch to manual mode
5. Set aperture f/11-16 (for sharpness)
6. Adjust shutter speed (experiment 1-30 seconds)
7. Use 2-second timer or remote
8. Shoot and review
Freezing Wave Action
Opposite approach – fast shutter speeds (1/500s or faster) freeze waves mid-crash. Spectacular when waves hit rocks or pour over rock pools.
Settings:
• Shutter priority mode (Tv or S)
• 1/500s or faster
• Continuous shooting mode
• High ISO if needed (1600-3200)
Timing: Watch wave patterns. Waves come in sets. Position yourself, wait for the big wave, shoot burst mode as it hits.
Using Foreground Interest
Beach scenes can look flat without foreground elements. Include:
• Rocks in foreground
• Rock pool edges
• Beach vegetation
• Driftwood
• Footprints in sand
Wide-angle lenses (16-35mm) exaggerate foreground, creating depth and leading lines into your composition.
Composition Tips for Beach Photography
Rule of thirds: Position horizon on upper or lower third line, not center. Put interesting elements at intersection points.
Leading lines: Use coastline curves, rock formations, or wave patterns to lead eyes through the image.
Symmetry: Rock pools and calm harbour beaches create perfect reflections. Position horizon exactly center for symmetrical compositions.
Negative space: Clean beaches with minimal elements create calm, minimalist compositions. Leave empty space (sky or water) around your subject.
Human element: Single person (swimmer, surfer, walker) adds scale and story to vast beach landscapes.
Drone Photography at Sydney Beaches
Drone photography has exploded in Sydney. Those epic aerial beach shots all over Instagram? Many are drones.
Regulations:
• Need drone pilot license (varies by drone weight)
• Cannot fly over people or within 30m of people
• Check CASA (Civil Aviation Safety Authority) app for no-fly zones
• Some beaches ban drones during busy times
• Maximum height 120m
I fly a DJI Mavic. Best times are early morning (fewer people, calm conditions, beautiful light). Always check regulations – fines are serious ($1,100+).
Best drone subjects:
• Wave patterns and turquoise water
• Beach curves and coastline
• Rock pools from above
• Surfers (from directly above)
• Harbour beaches with city views
Weather Conditions for Photography
Clear Blue Sky Days
Beautiful for swimming, boring for photography. Cloudless blue skies create flat, uninteresting images. You can make it work (shoot at golden hour, use interesting foregrounds), but it's challenging.
Dramatic Cloud Days
Clouds add drama, texture, and interest. Partly cloudy days are perfect – the clouds catch sunrise/sunset colors, create god rays, and add visual interest.
I actually hope for clouds at sunrise/sunset. The best beach photos happen when there's 30-50% cloud cover.
Storm Conditions
Before/after storms creates dramatic light, huge waves, and moody skies. Spectacular for photography but dangerous. Safety first – don't risk it if conditions are too rough.
Fog
Rare in Sydney but magical when it happens. Fog softens everything, creates mystery, and makes familiar beaches look completely different.
Photography Gear Recommendations
Essential Equipment
Camera: Any camera works. Phone cameras are surprisingly good now. DSLR or mirrorless gives more control.
Lenses:
• Wide-angle (16-35mm): Beach landscapes, sweeping views
• Standard zoom (24-70mm): Versatile for everything
• Telephoto (70-200mm): Compressing scenes, distant surfers
Tripod: Essential for sunrise/sunset, long exposures, blue hour. Get a sturdy one that handles wind.
Filters:
• ND filter (6-10 stop): Long exposures in daylight
• Polarizing filter: Reduces reflections, deepens blue sky, makes water more transparent
Optional but Useful
• Remote shutter release
• Lens cleaning cloth (salt spray is real)
• Waterproof camera bag
• Spare batteries (cold mornings drain batteries fast)
• Rocket blower (for sand on sensor)
Protecting Your Gear at the Beach
Sand and salt water destroy cameras. I learned this the hard way.
Sand protection:
• Never change lenses at the beach (sand gets in)
• Use lens hood to protect front element
• Keep camera in bag when not shooting
• Clean gear thoroughly after beach sessions
Salt spray:
• Wipe down camera body with damp cloth after shooting
• Clean lens with proper lens cloth
• Never use salt-covered hands on camera
Water:
• Invest in rain cover or waterproof housing if shooting in spray
• Keep camera bag away from waves
• Watch for rogue waves (I've seen photographers' gear destroyed)
Photographing Surfers
Surfing shots are challenging but rewarding. You need:
• Fast shutter speed (1/500-1/1000s)
• Continuous autofocus (AI Servo/AF-C)
• Burst mode
• Telephoto lens (70-200mm or longer)
Position: Shoot from the beach or headland. Water photography (with underwater housing) is advanced.
Timing: Morning light on east-facing beaches. Surfers are usually in the water 6-9am.
Patience: You'll take 500 shots to get 5 good ones. Surfing is unpredictable.
Ethics and Etiquette
Respect privacy: Don't photograph people without permission, especially kids. If someone's recognizable, ask first.
Don't block paths: Popular viewpoints get crowded. Be aware of other photographers and tourists.
Respect sacred sites: Some coastal areas are culturally significant to Aboriginal people. Research before shooting.
Leave no trace: Don't disturb beach ecosystems for photos. No moving rocks, damaging vegetation, etc.
Drone etiquette: Follow regulations, don't fly over people, be respectful of beach-goers' privacy.
Instagram Spots (The Honest Truth)
Yes, those famous Instagram beach shots are real. But know what you're getting into:
Bondi Icebergs pool: You'll be one of 20 photographers at sunrise. Still worth it, but not 'secret.'
Figure 8 Pools: Requires difficult hike, only accessible certain tide conditions, crowded.
Wedding Cake Rock: Closed due to danger. Don't risk it.
My advice: Visit Instagram spots but also explore less-famous beaches. The best photos come from places you discover yourself.
Post-Processing Beach Photos
I use Lightroom for all beach photos. Basic workflow:
1. Adjust exposure: Brighten if needed
2. Tweak white balance: Slightly warm for golden hour
3. Boost vibrance: Makes water more turquoise (don't overdo)
4. Increase clarity: Adds detail to rocks and waves
5. Dehaze: Useful for Sydney's sometimes hazy conditions
6. Adjust highlights/shadows: Recover detail
7. Crop: Rule of thirds, remove distractions
8. Sharpen: Final touch
Keep editing subtle. Over-processed beach photos look fake.
Learning Beach Photography
Practice regularly: Visit the same beach repeatedly, different times, conditions. You'll learn what works.
Study others' work: Follow Sydney beach photographers on Instagram, note their techniques.
Experiment: Try different settings, compositions, times. Digital photography is free – shoot lots.
Join photography groups: Sydney has excellent photography Meetup groups. Learn from experienced photographers.
Workshops: Several Sydney photographers run beach photography workshops. Worth considering if you're serious.
Best Seasons for Beach Photography
Summer: Beautiful light, beach activity, but crowded. Good for lifestyle beach photos.
Autumn: My favorite. Clear skies, fewer crowds, still-warm light. Perfect conditions.
Winter: Dramatic conditions, big waves, moody skies. Challenging but rewarding. Fewer people.
Spring: Variable conditions, interesting clouds, beautiful light. Good all-around season.
Vietnamese Photographers: Cultural Notes
Coming from Vietnam, you'll notice:
Different light: Sydney's latitude creates different golden hour angles and durations than Vietnam.
Less humidity: Clearer, sharper images (less atmospheric haze than tropical Vietnam).
Cooler tones: Water looks different from Vietnamese beaches – different color temperature.
Privacy expectations: Australians are more privacy-conscious about photography than in Vietnam. Always ask before photographing recognizable people.
Why Beach Photography Matters to Me
Beach photography forced me to wake early, explore Sydney's coastline, and pay attention to light, weather, and tides. It's taught me patience (waiting for perfect light), persistence (returning to locations multiple times), and appreciation for Sydney's natural beauty.
The best part? You don't need fancy gear or professional training. Just a camera (or phone), willingness to wake early, and curiosity to explore.
Start with one beach near you. Visit at different times, experiment with settings, and see what you create. Sydney's beaches are endlessly photogenic – you just need to show up.